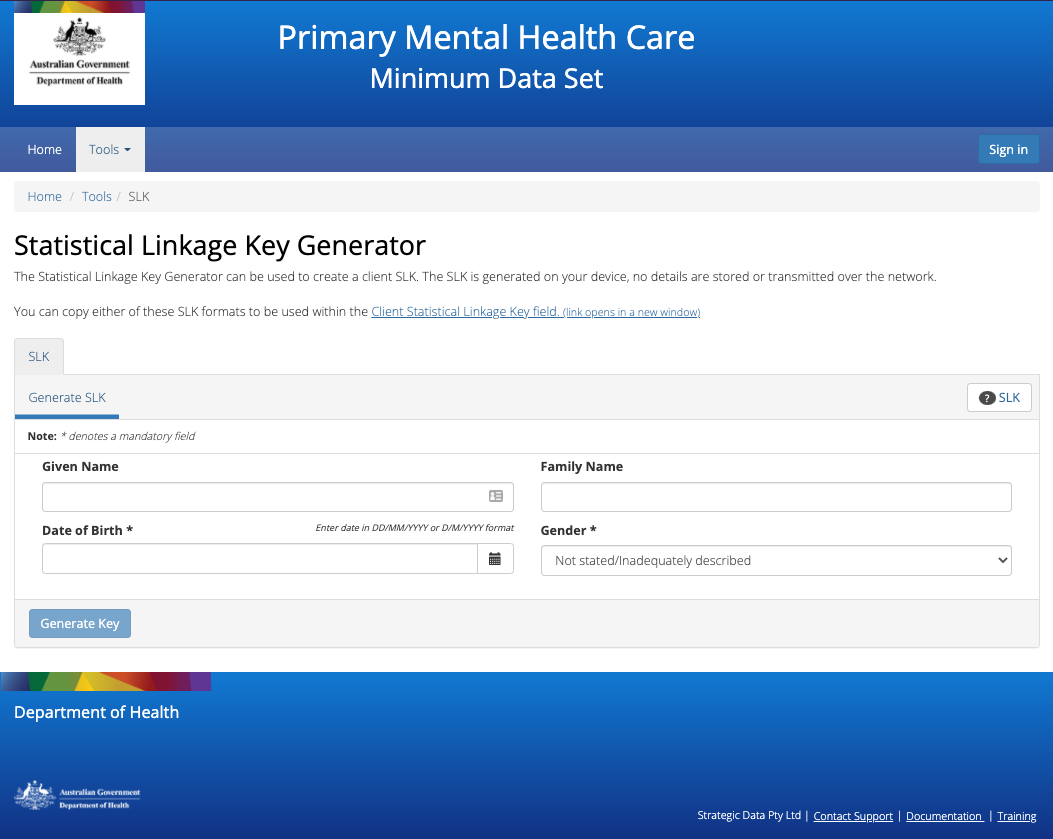
We have provided a stand-alone generator that can be used without logging into
the PMHC MDS on https://pmhc-mds.net. This allows users to generate a client’s
Statistical Linkage Key (SLK) to enter into upload files.
This tutorial will cover a basic introduction to the Statistical Linkage Key (SLK).
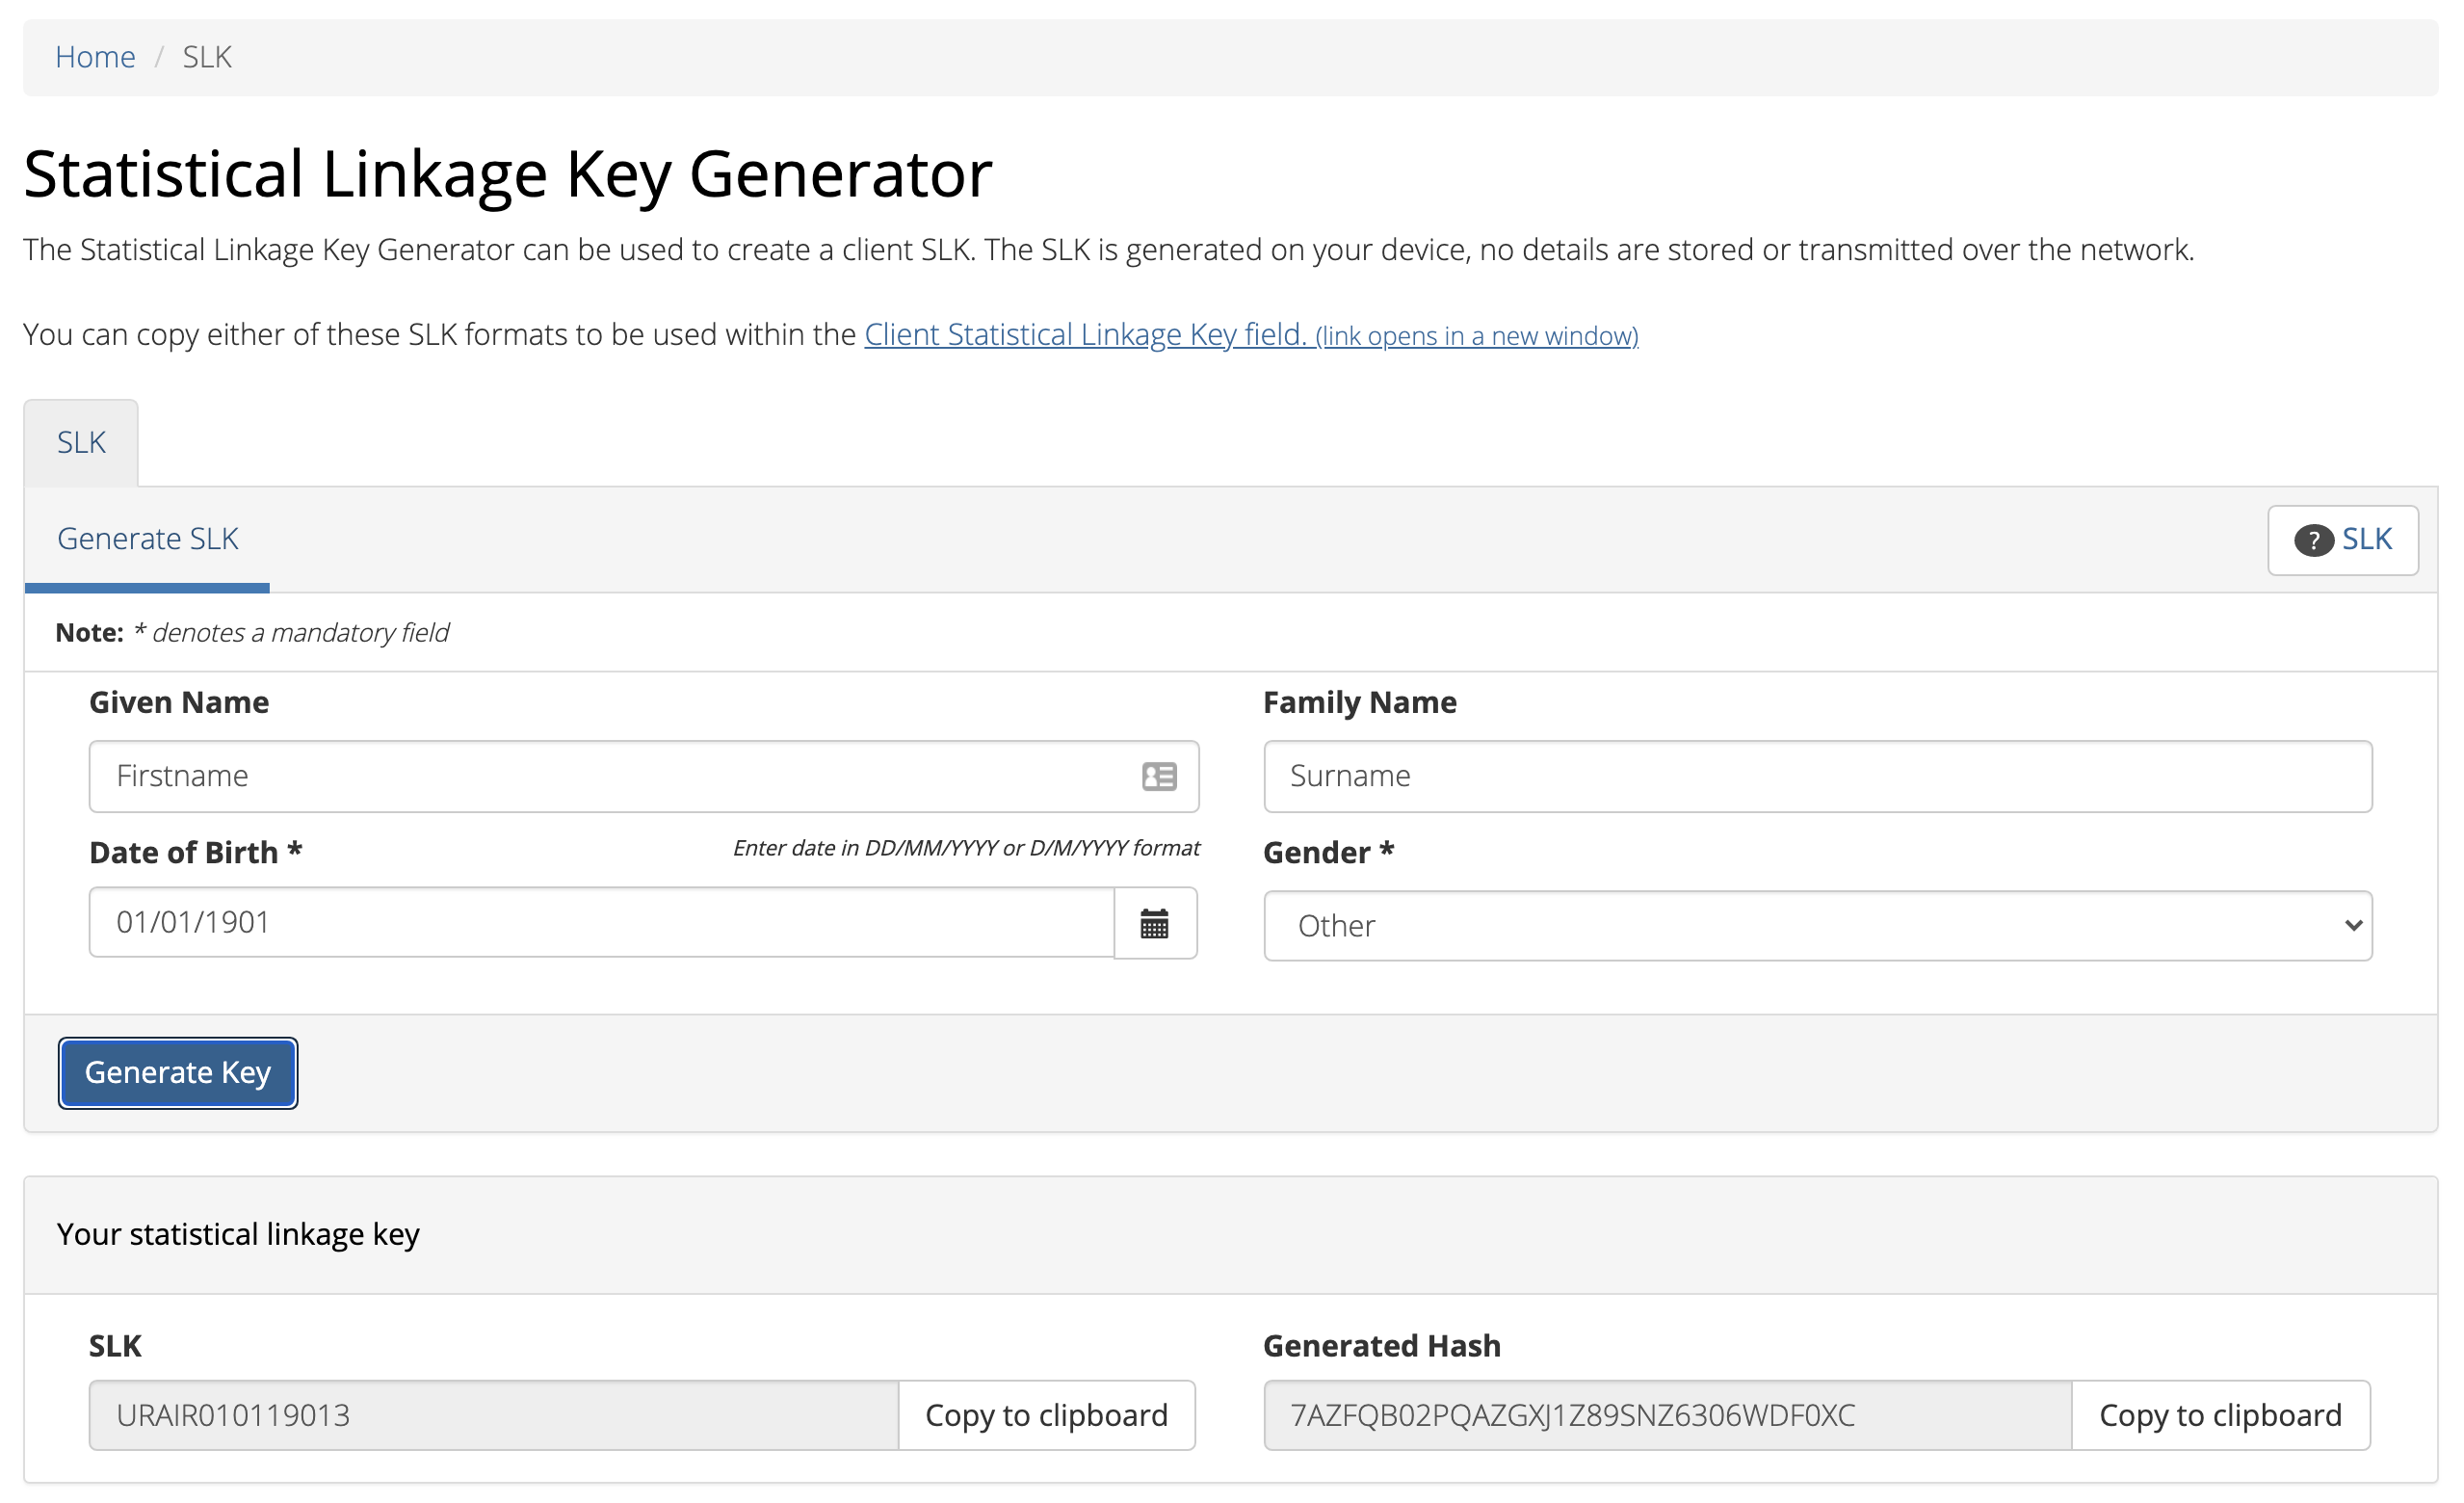
It will enable viewers to understand where you can find relevant SLK information,
step-by-step instructions on using the manual SLK generator provided on the PMHC MDS
and discusses the technical materials for implementing an SLK generator into an
internal client information management system.
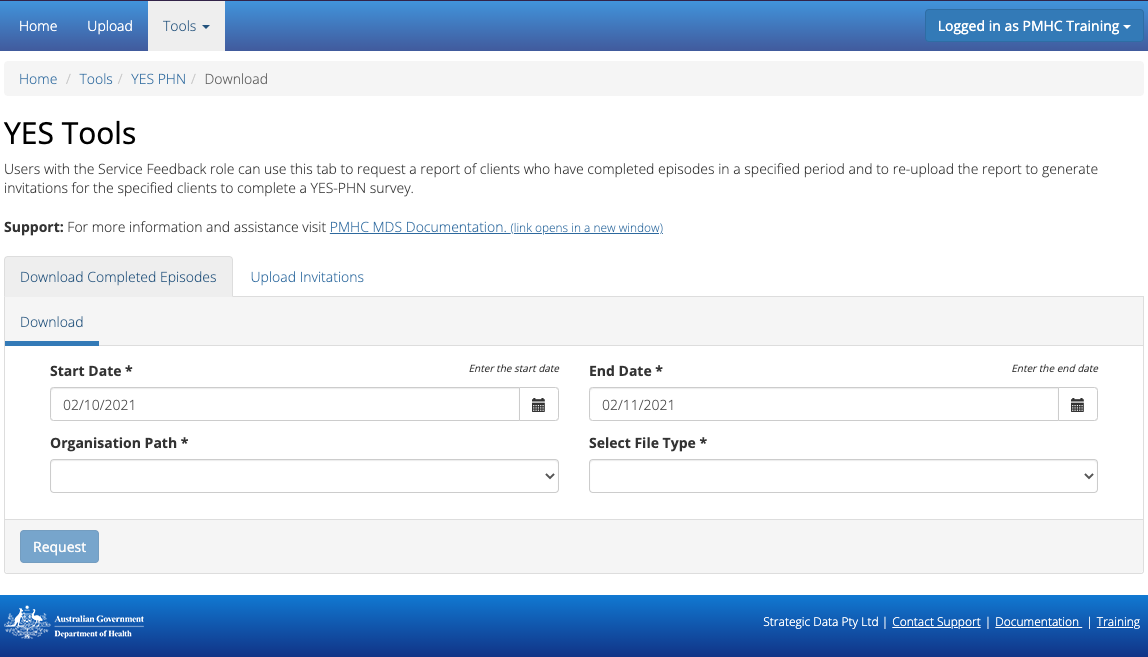
After navigating to the Tools: YES-PHN tab, you will see a tab to request a report of
clients who have completed episodes in a specified period and a tab to re-upload the
report to generate invitations for the specified clients to complete a
Your Experience of Service Primary Health Network (YES PHN) Survey.
You will only be able to see the Tools: YES-PHN tab if you have been assigned
the ‘Service Feedback’ Users Roles, when logged into the PMHC MDS on https://pmhc-mds.net.
If you don’t have access to the Tools: YES-PHN tab and you believe you should, please
contact someone in your provider organisation or provider organisation’s PHN
who has the ‘User Management’ role. If you are unsure who has the ‘User Management’
role please email the PMHC Helpdesk at support@pmhc-mds.com
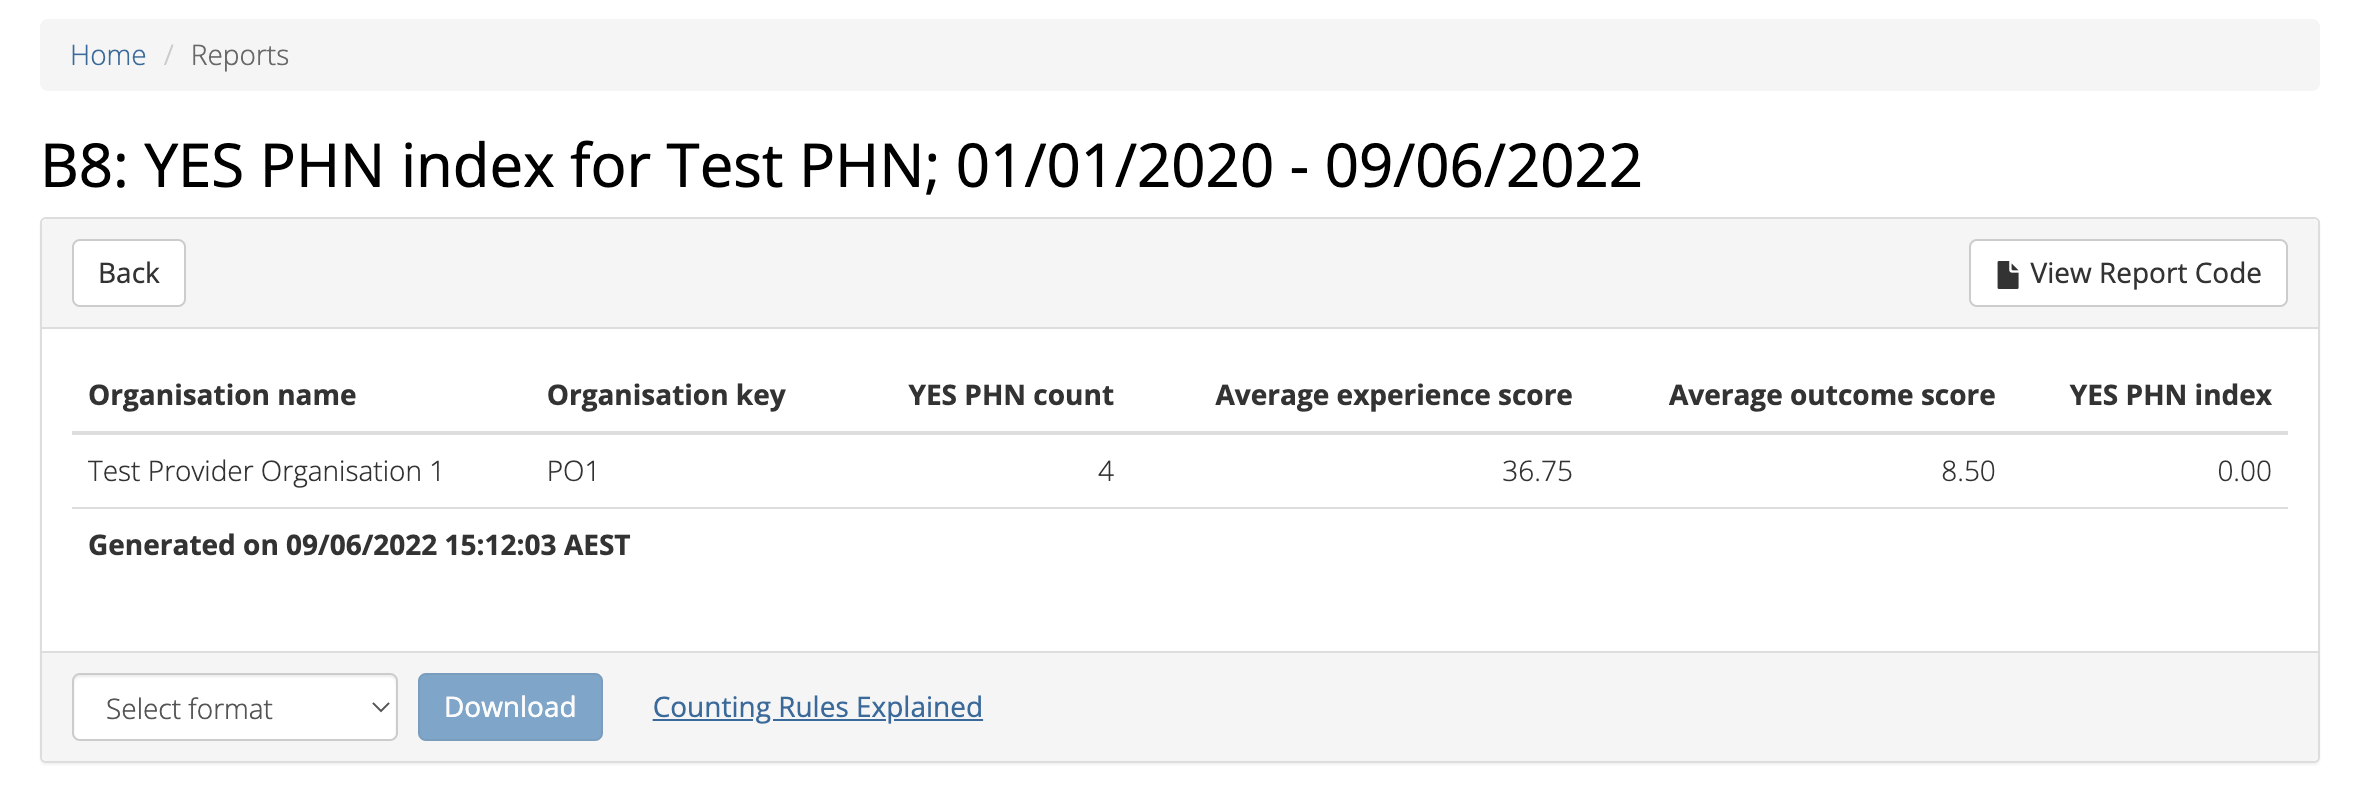
You can request a report of clients who have completed episodes in a specified period by completing
the Download fields in the Tools: YES-PHN tab, by following these steps:
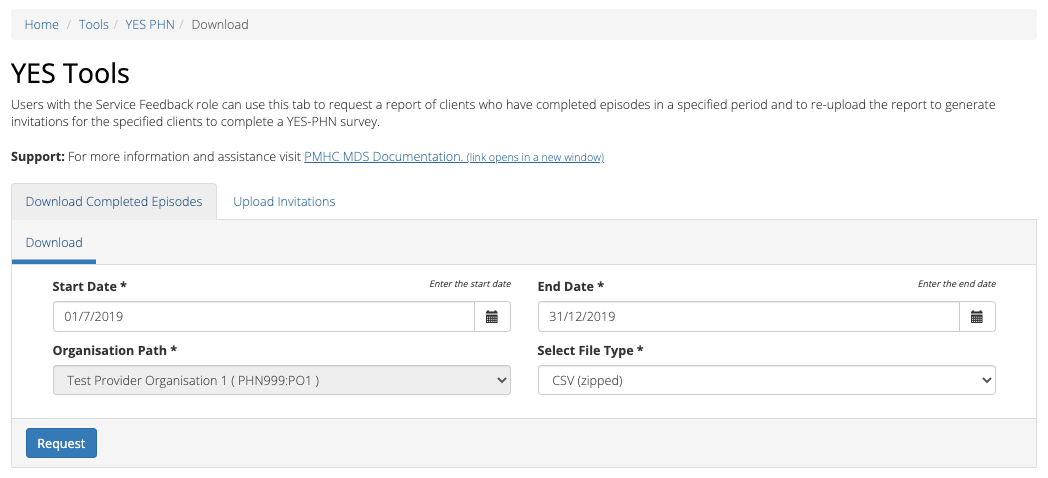
If you are allowed to download data from more than one organisation you will be
asked to select an organisation name
Select the appropriate file type to be downloaded
Click the blue Request button
A dialogue box will be displayed, showing that the file is being requested from the server
When the file is ready, a ‘File ready for download’ message will be displayed
Click the blue Download button
The data extract will be downloaded to your computer
Note
Excel automatically removes leading zeros, and converts large numbers to
scientific notation, like 1.23E+15, in order to allow formulas and math
operations to work on them. See Excel file issues
The Download Completed Episodes dates are based on the Client’s Episode End Date
for the PMHC MDS. The file will include all Episodes that have an end date
within the date range of the request.
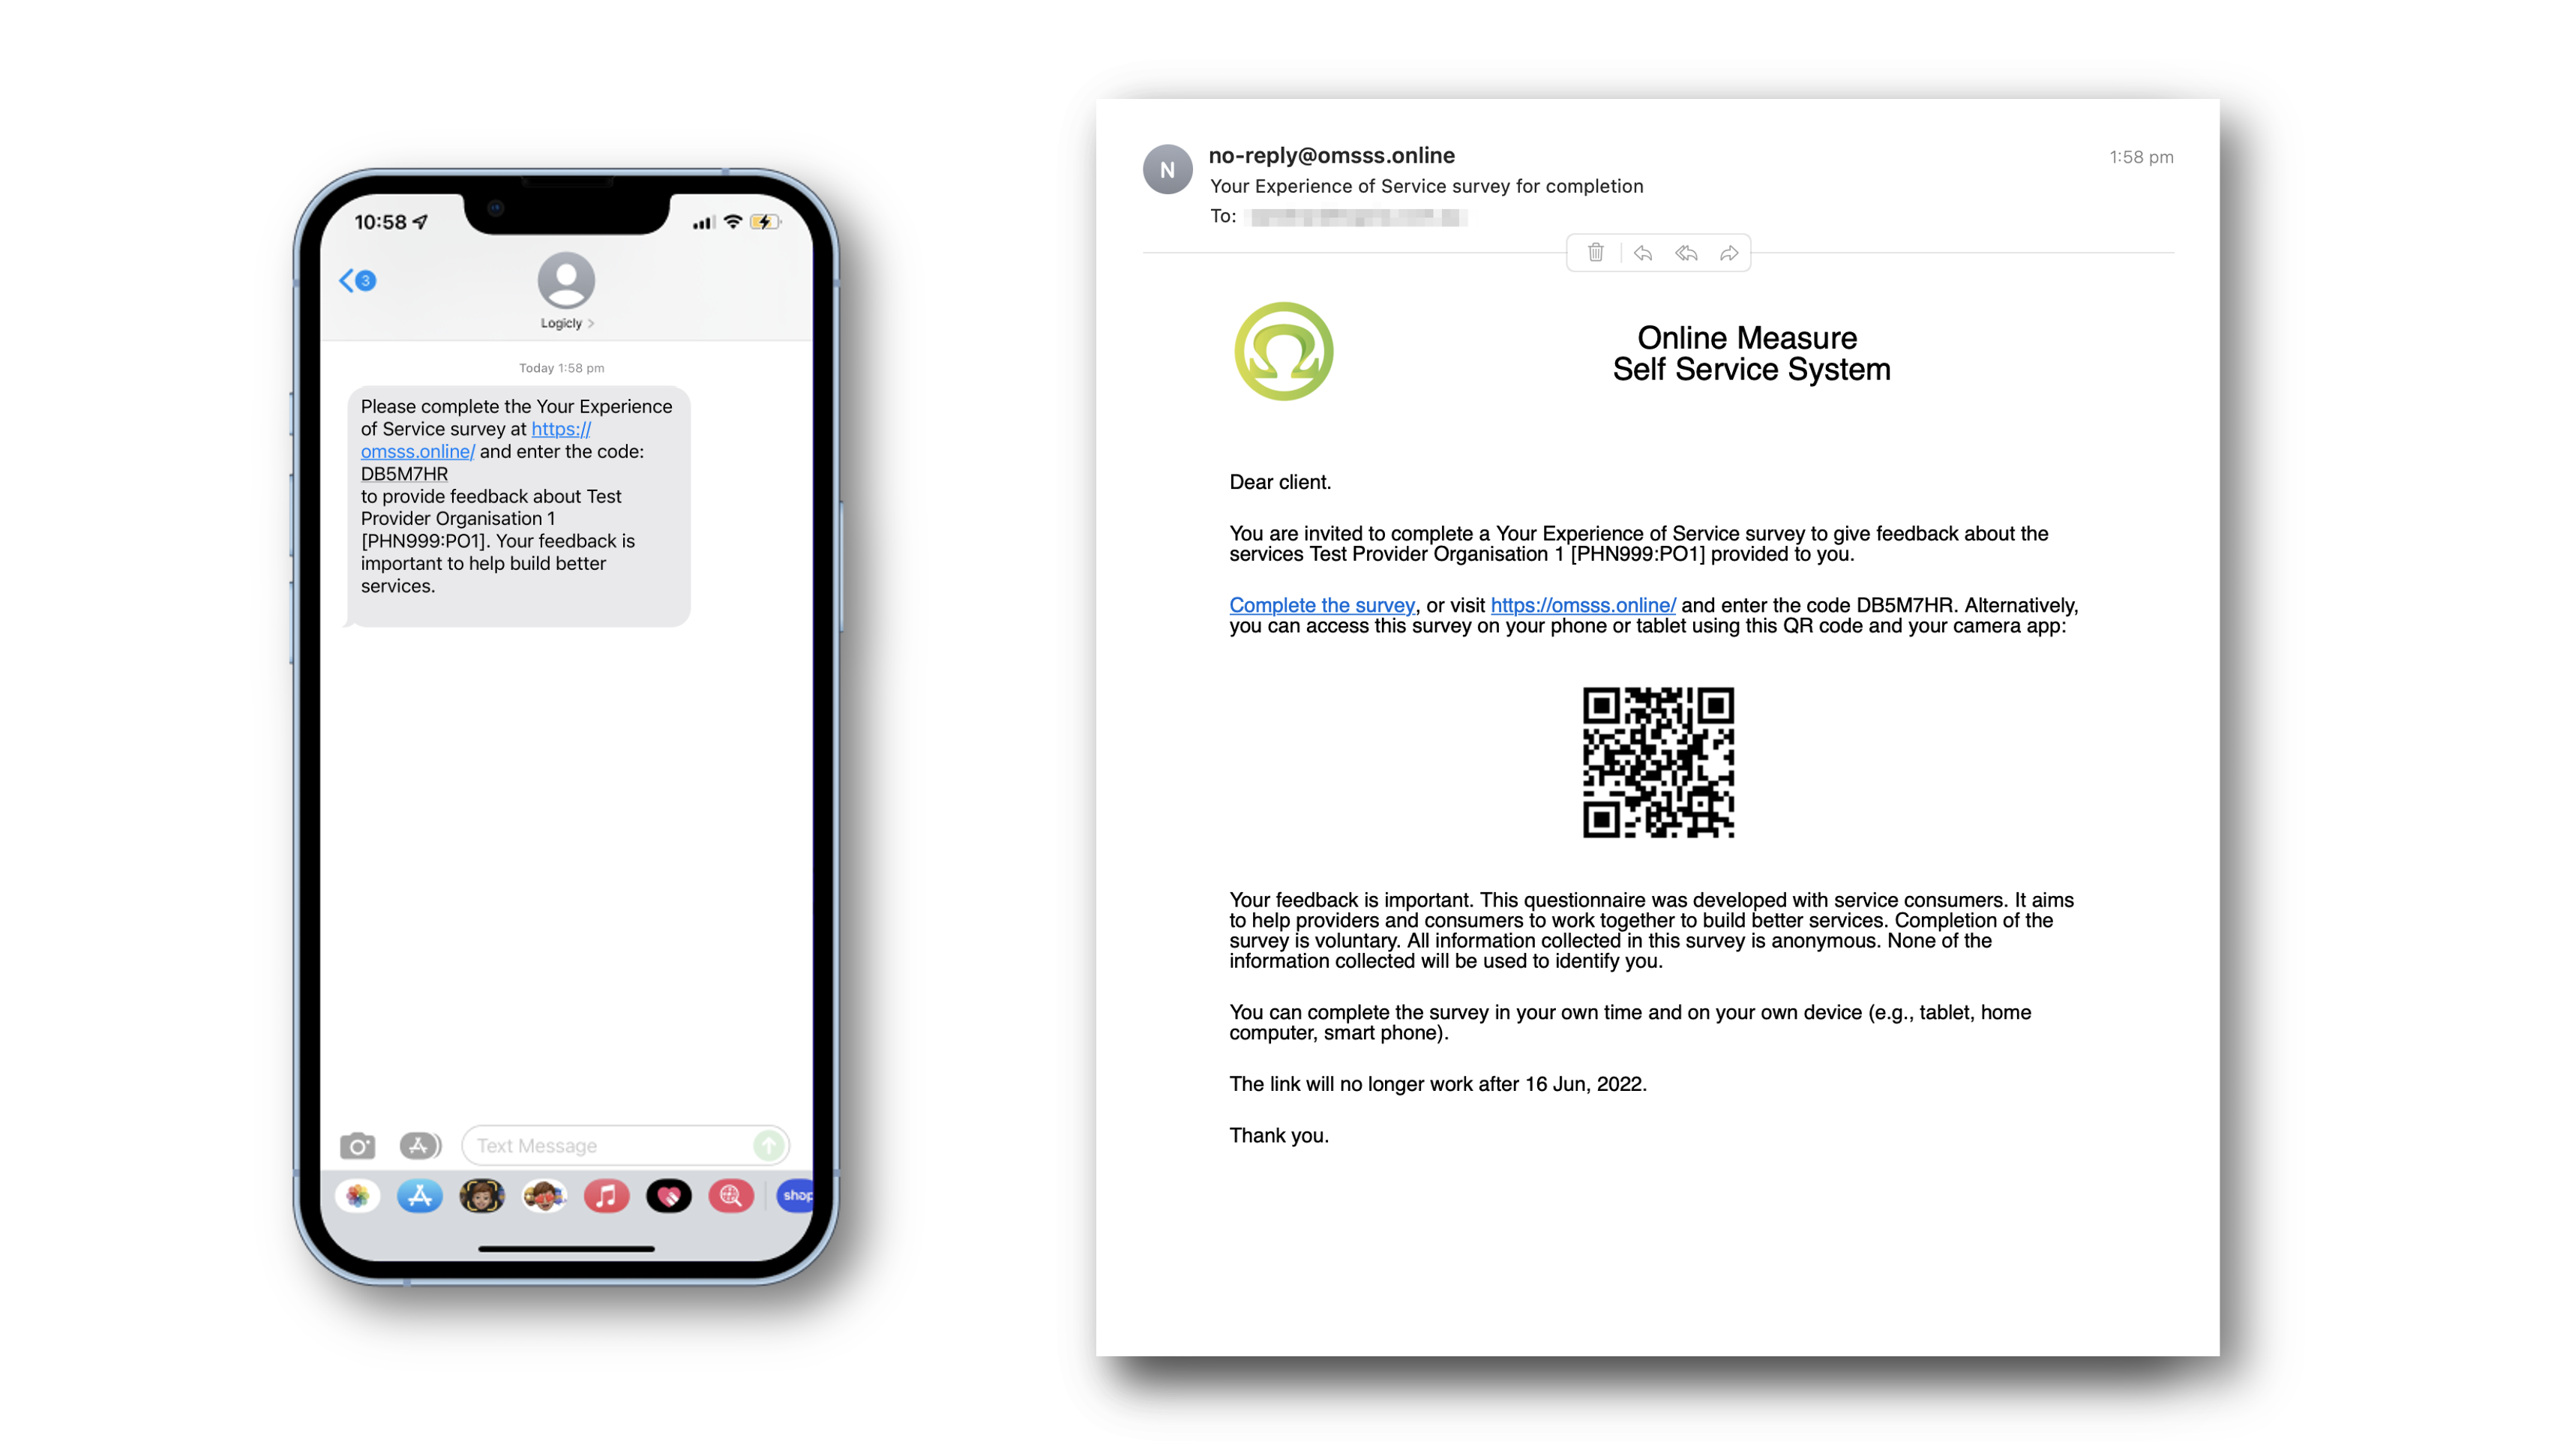
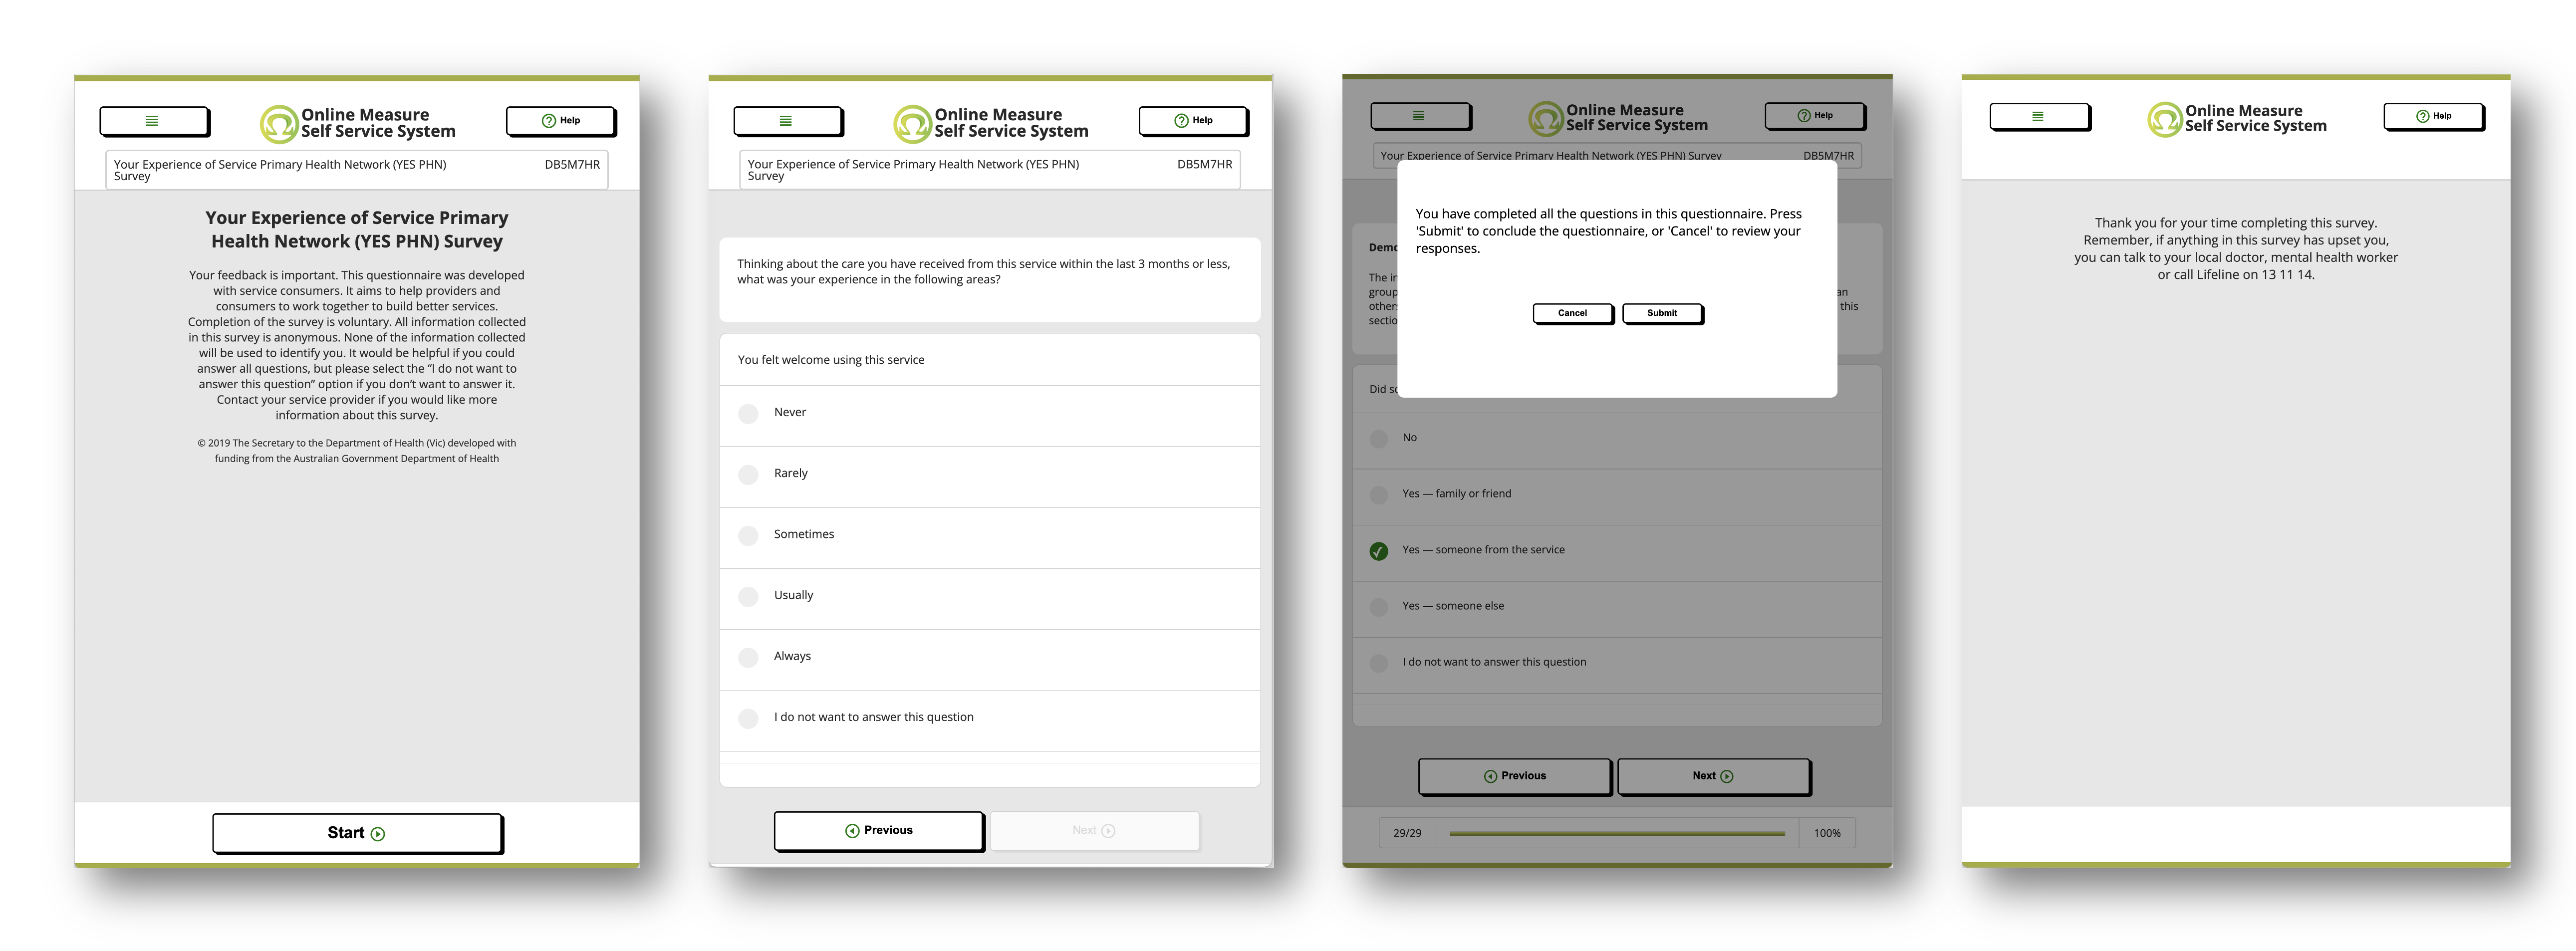
The YES-PHN survey is designed to gather information from mental health consumers
about their experiences of care. See What is the YES-PHN survey?.
After navigating to the Tools: YES-PHN tab, you will be able to upload client
details for the organisations for which you have the ‘Service Feedback’ role and
‘Upload’ role. The upload process will send YES-PHN invitations to these clients
via email or SMS.
The YES-PHN invitations file can either be auto generated through an internal system,
or a Download Completed Episodes can be manually completed by adding
one of the the client’s details, either the
mobile_number, or
email, and
reminders
fields as documented in the YES_PHN specifications.
(Please note: manual changes to columns A-E should not occur. See Incorrect data)
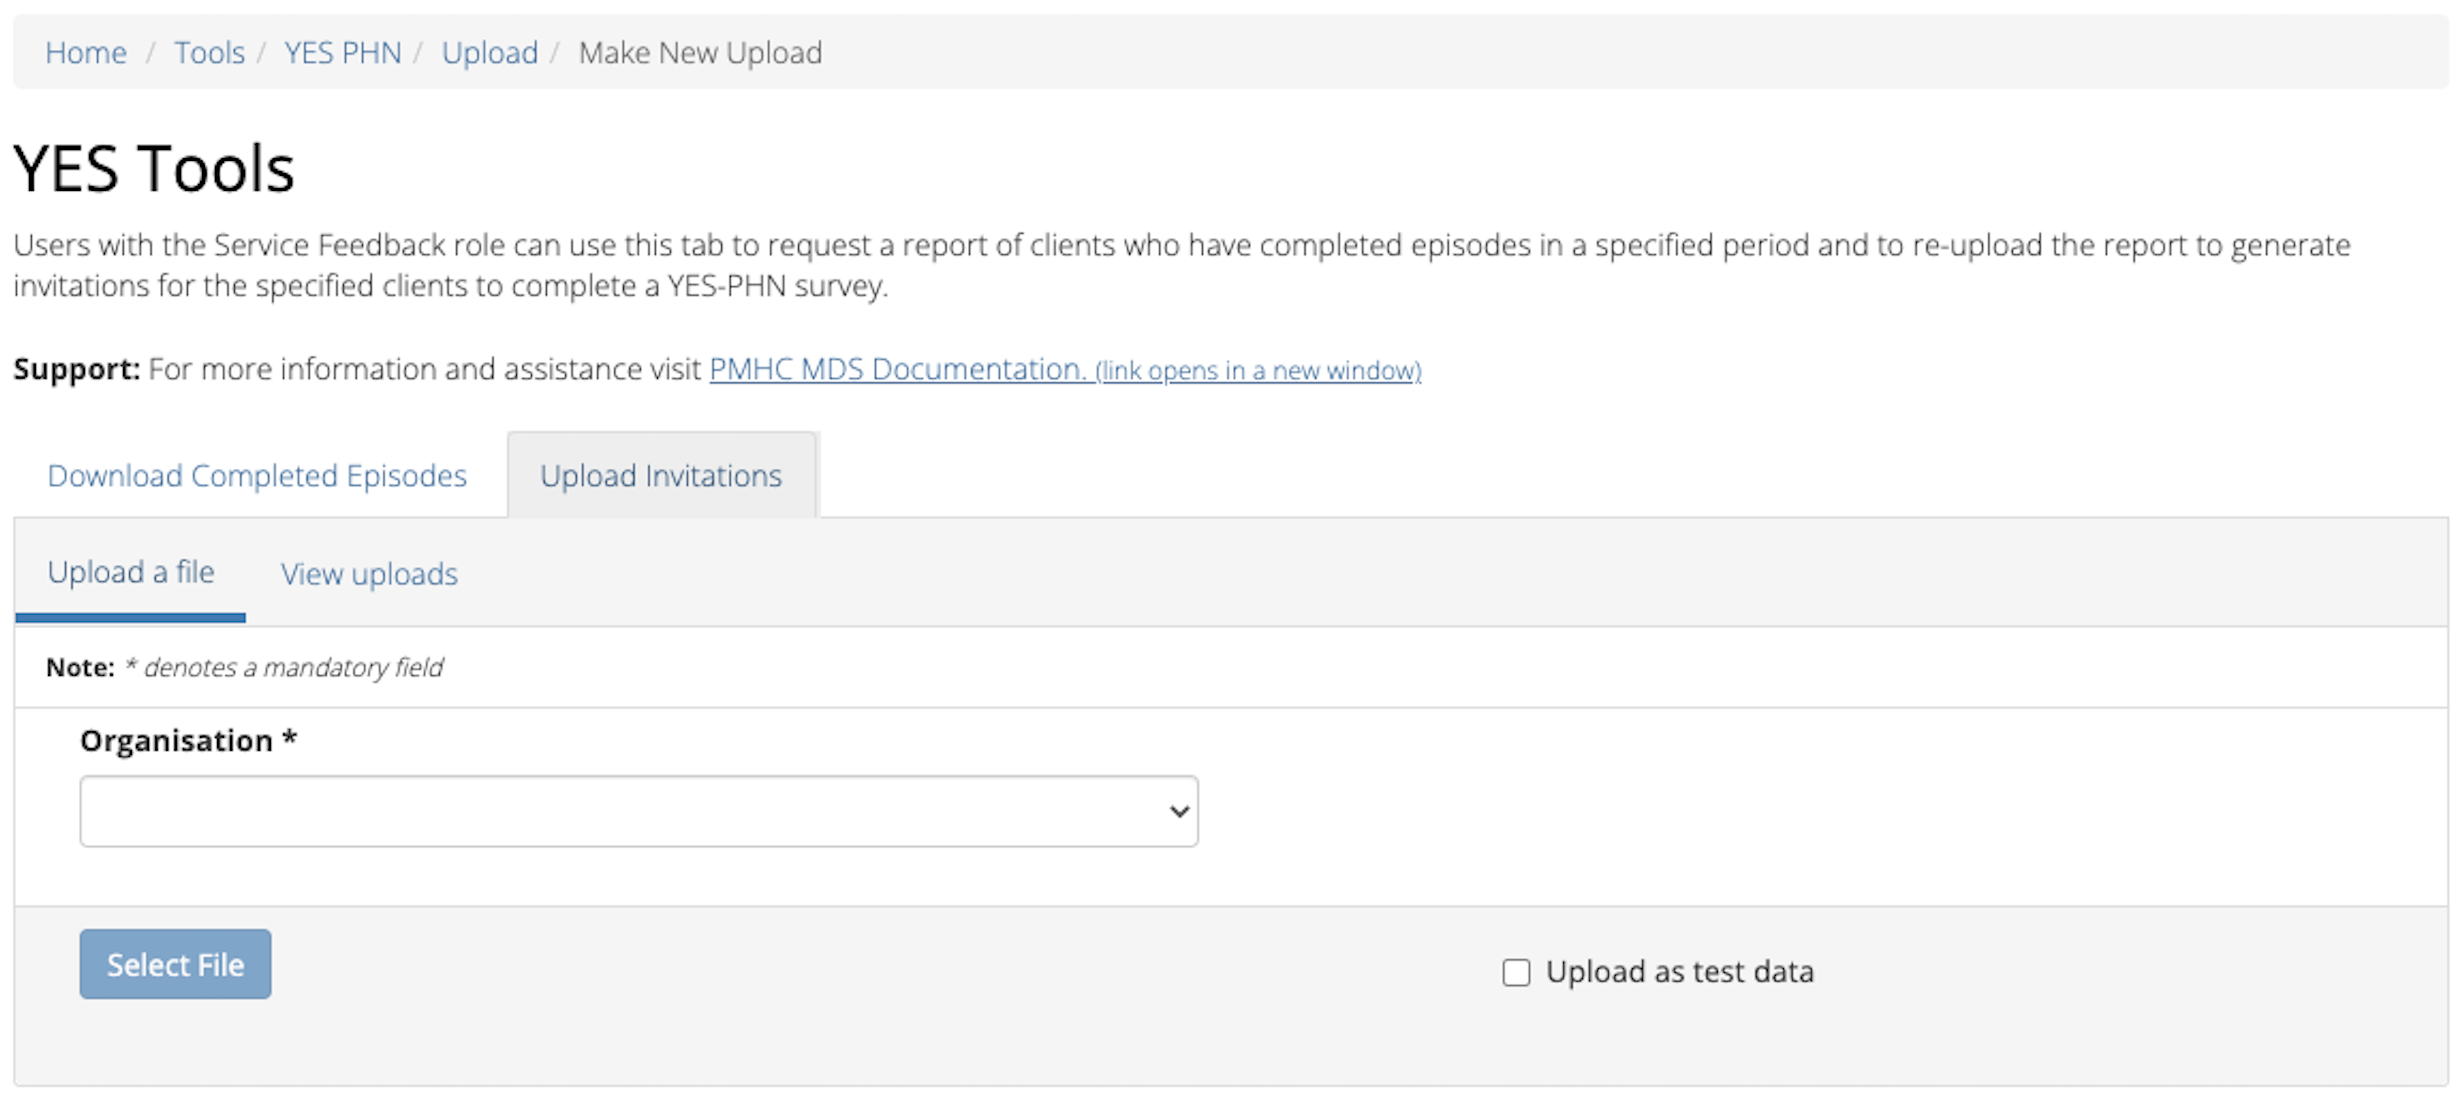
You can upload YES-PHN invitations files through the upload tab, by following these steps:
Navigate to the Tools: YES-PHN tab
Click the Upload Invitations tab
Click the Upload a file tab
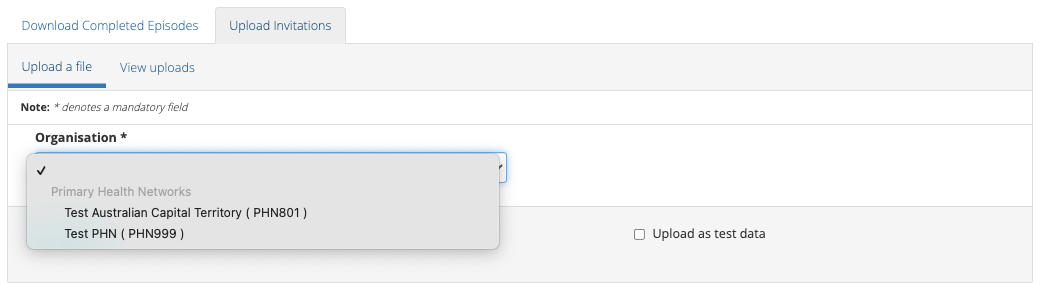
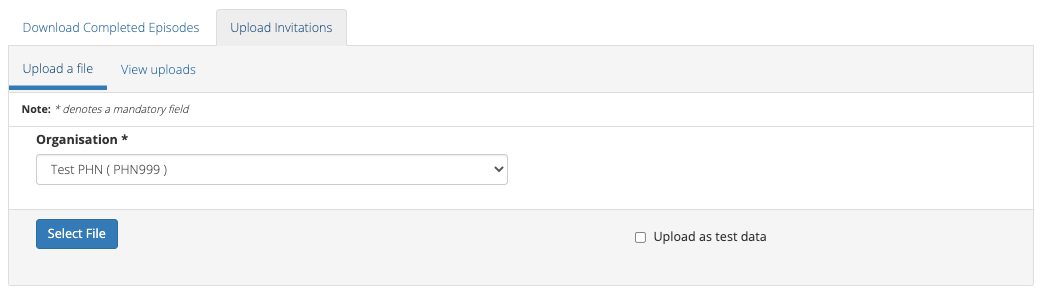
The PHN will be pre-filled in the Organisation field, unless you are
allowed to upload to more than one PHN. (If blank - See Can’t see the organisation)
Click the blue Select File button
Navigate to where the upload file is saved on your system. Select the file
and click the grey Open button
Check to ensure you have selected the correct file by reviewing the file
name now displayed below the Select File button
Click the green Upload button
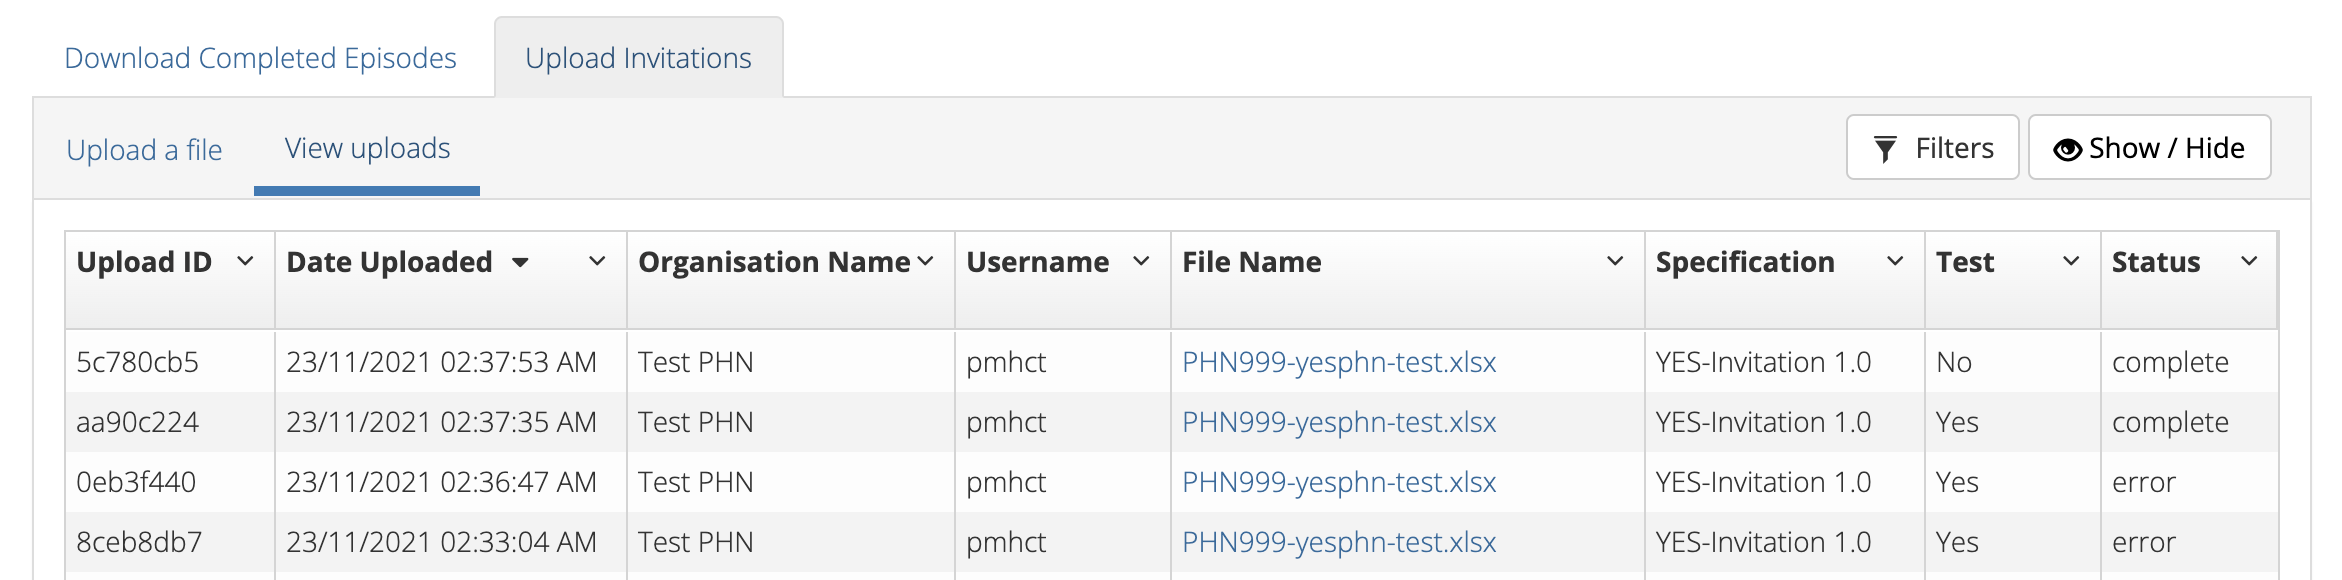
You will receive confirmation that your file has been accepted. The file will
now be validated and you will receive a confirmation notification and an
email. You can click on the link confirmation notification or open the email
to view the upload status, informing you that your file was successfully uploaded to
the PMHC MDS, or informing you of any errors that occurred. See Viewing Previous Uploads.
Please email support@pmhc-mds.com if you don’t receive an email within one hour.
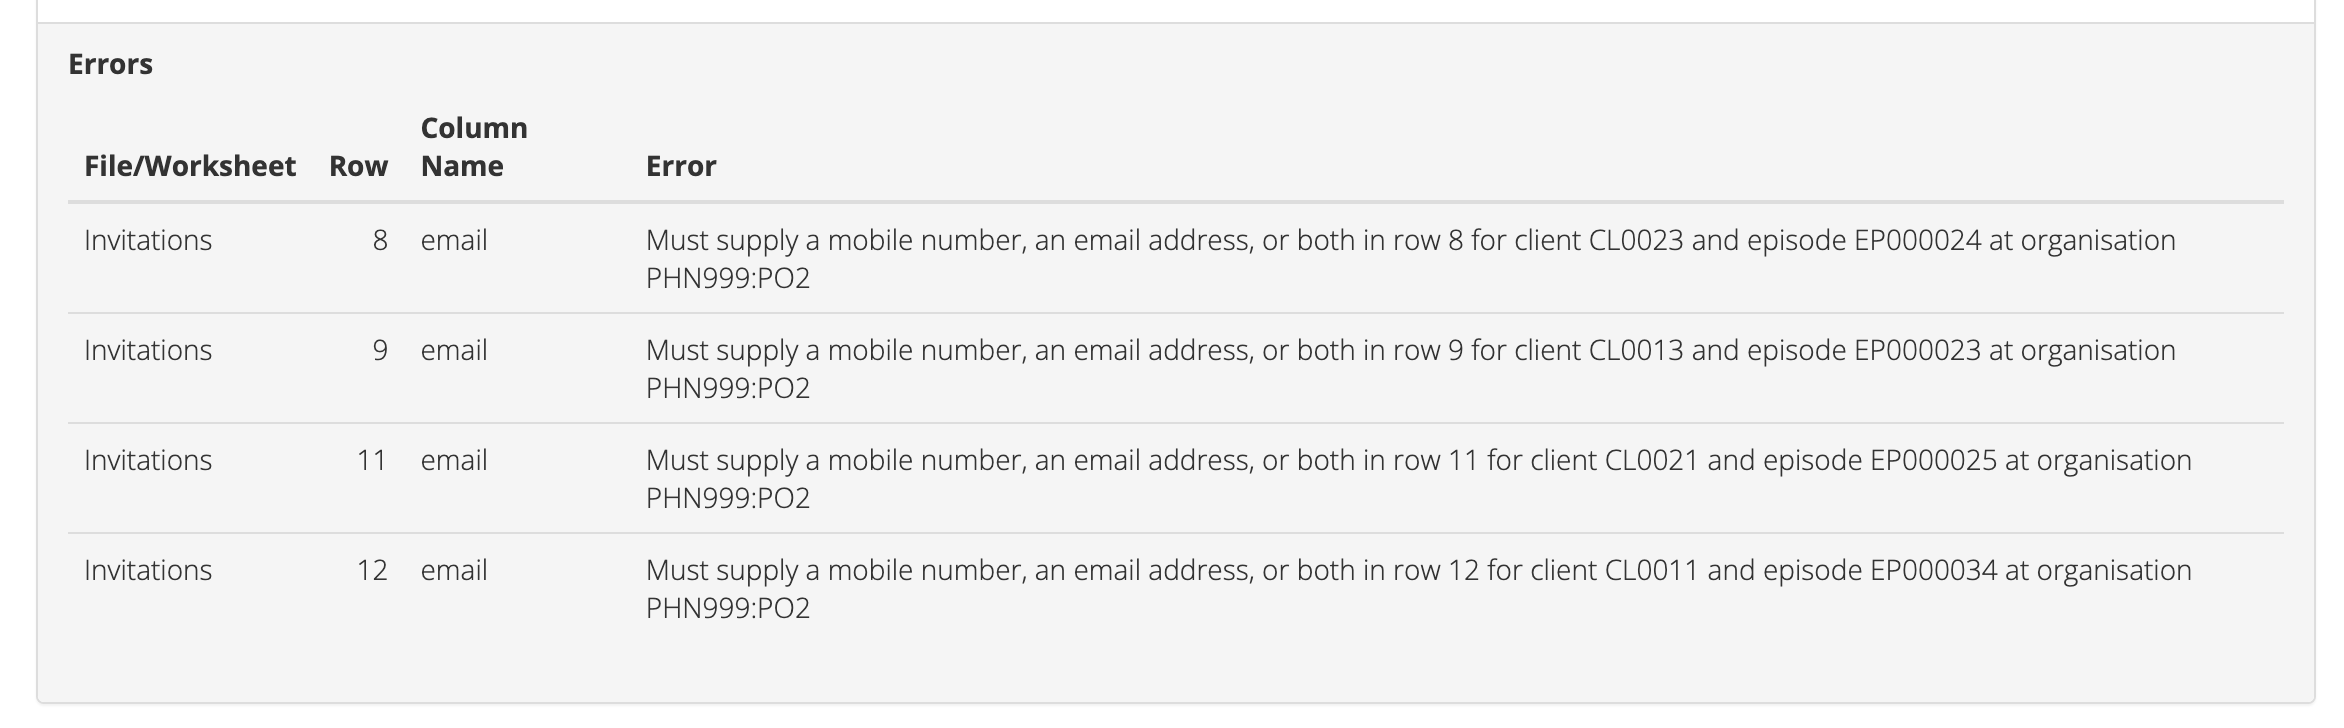
Further discussion about the error messages can be found at Error messages.
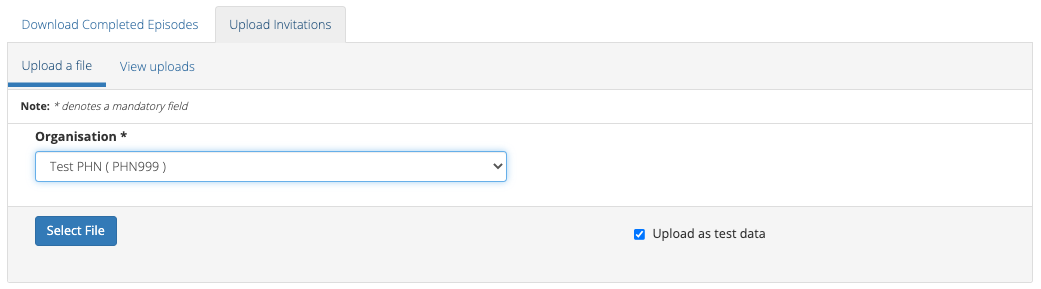
A file can be uploaded in Test Mode. When uploading in test mode, the file is
validated, however the data is not updated in the PMHC MDS database.
After navigating to the Upload tab, you will be able to upload in Test Mode
data files to organisations for which you have the ‘Service Feedback’ role.
You can upload data files in Test Mode through the Upload tab, by following these steps:
Navigate to the Upload tab
If you are allowed to upload to more than one organisation you will be
asked to select an organisation name
Select the name of the organisation whose data you are uploading from the drop down list
Click the blue Select File button
Navigate to where the upload file is saved on your system. Select the file
and click the grey Open button
Check to ensure you have selected the correct file by reviewing the file
name now displayed below the Select File button
Click the Upload as test data checkbox on the right hand side
Click the green Upload button
You will receive confirmation that your file has been accepted. The file will
now be validated and you will receive an email informing you if
your file was valid, or informing you of any errors that occurred.
Even if your file was valid, the data will not be updated in the PMHC MDS database.
Viewing Upload Details for complete uploads will display data verification
information by listing the number of data records present and if those records
are added, updated, or deleted, within the MDS records.
Any upload validation errors will need to be corrected in your internal system and
a new upload file created. Or if you manually record data on the upload file, you
can edit the data records directly on the file. See - Validation Rules.
The definition of each data item has associated notes that will provide guidance
on why an error is returned. By visiting the data specifications documentation
and clicking on the Record formats field name this will take you to the
field definition which outlines the associated notes.
In the Frequently Asked Questions guide there are questions about some of the
common and unusual upload error messages. These answers contain information on
what you can do to fix the error. See - YES-PHN FAQs.
If you require assistance in understanding an error message, please email support@pmhc-mds.com.
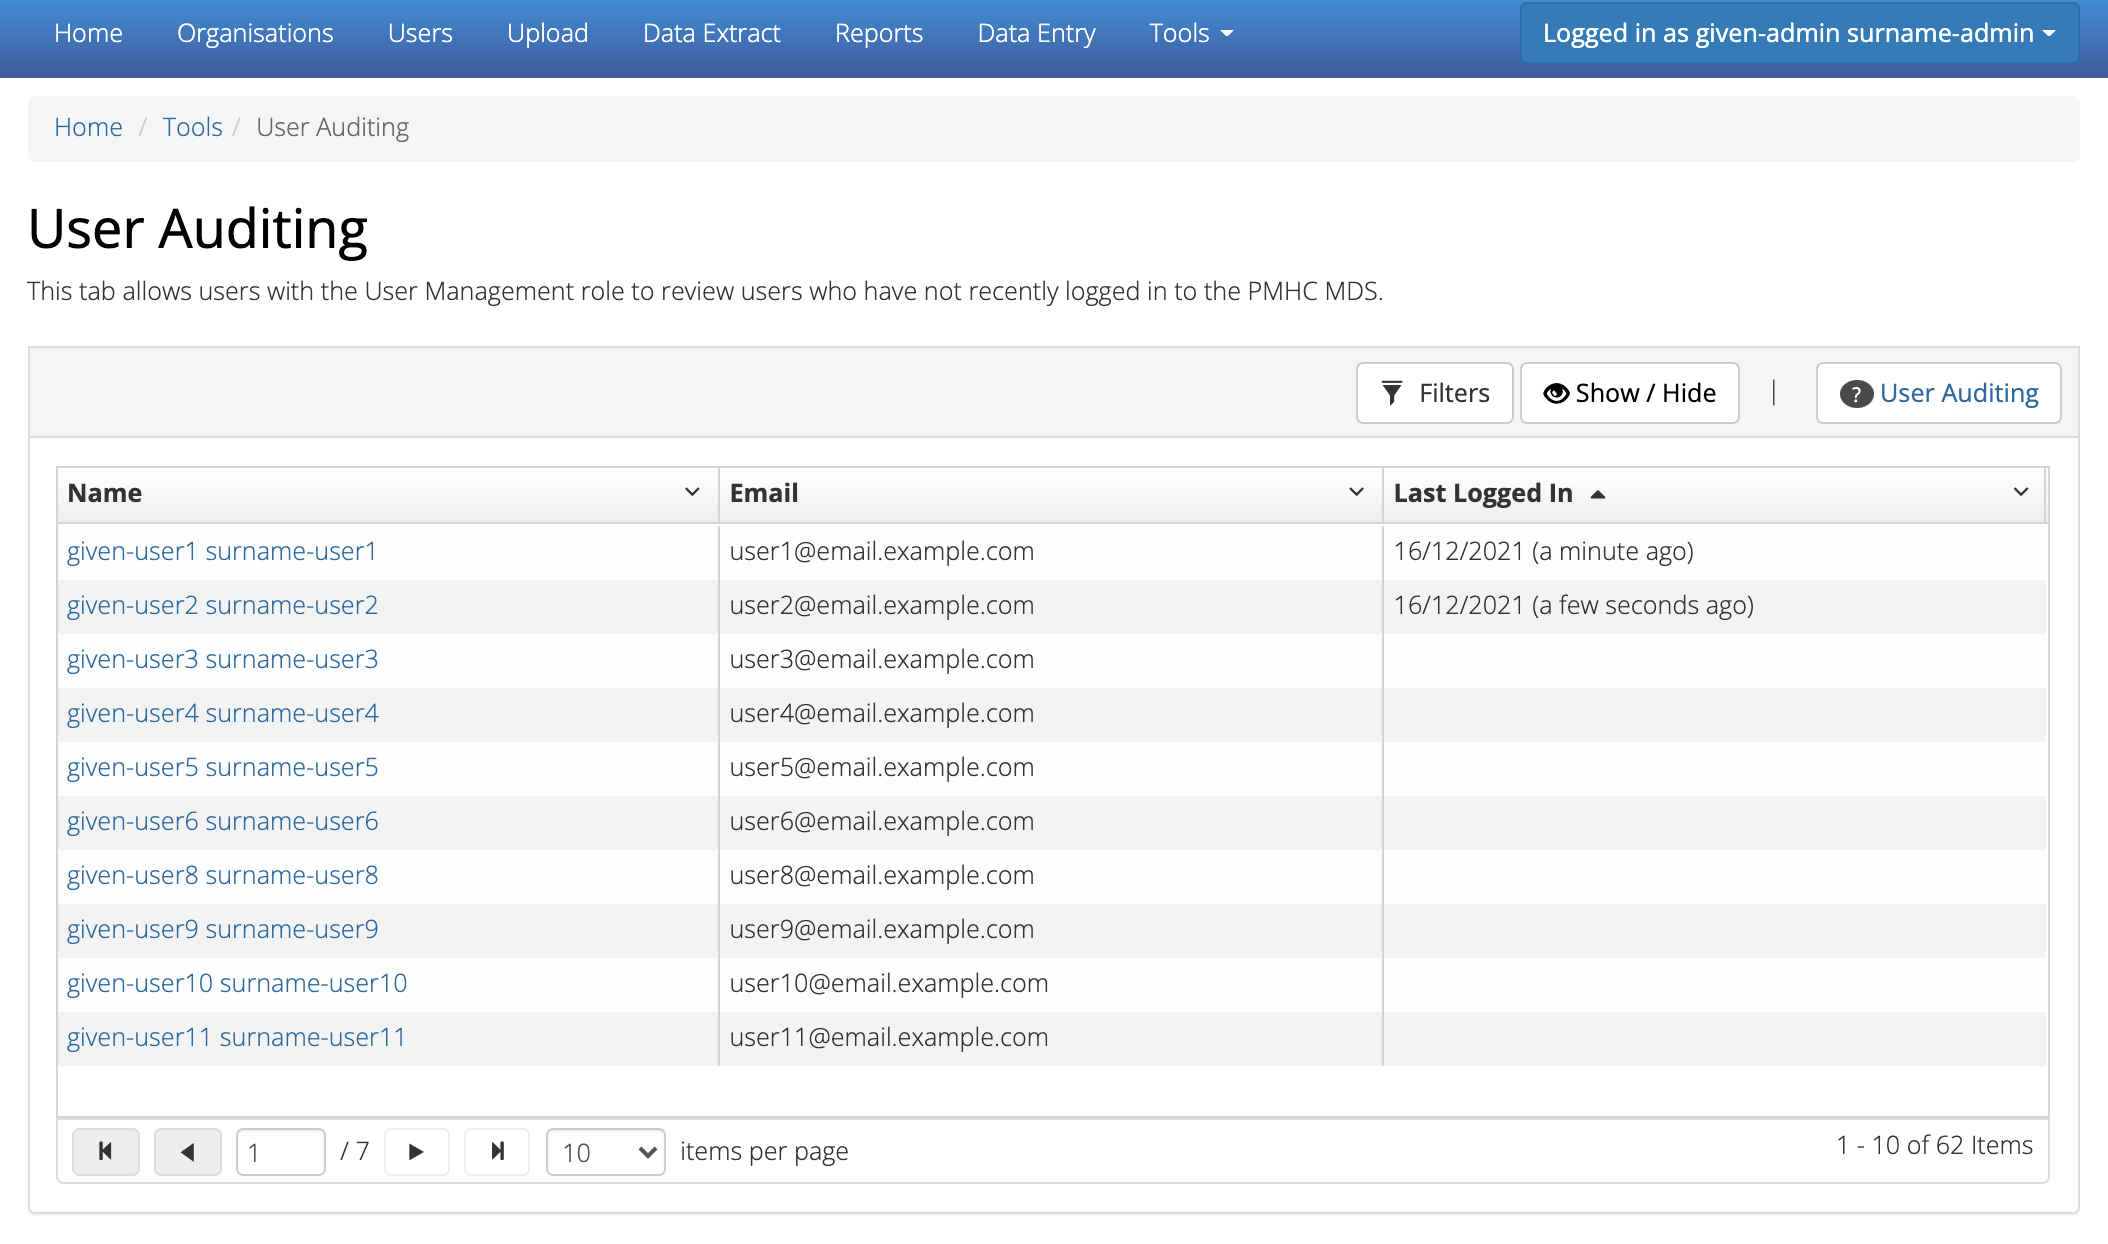
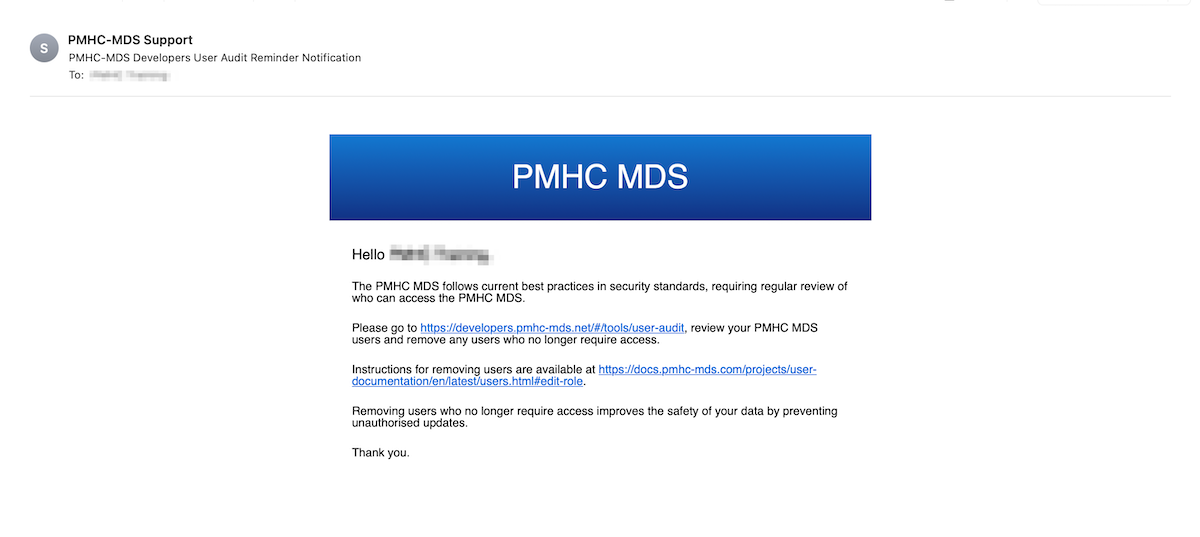
The Tools: User Auditing tab allows users with the User Management role to
review users who have not recently logged in to the PMHC MDS.
You will only be able to see the Tools: User Auditing tab if you have been
assigned the ‘User Management’ Users Roles, when logged into the PMHC MDS on https://pmhc-mds.net.
If you don’t have access to the Tools: User Auditing tab and you believe you should, please
contact someone in your provider organisation or provider organisation’s PHN
who has the ‘User Management’ role. If you are unsure who has the ‘User Management’
role please email the PMHC Helpdesk at support@pmhc-mds.com.
After navigating to the Tools: User Auditing tab, you will be presented with
a table of users whose access you manage. By default, the table is sorted by
the ‘Last Logged In’ column sorted so that users who have not logged in for the
longest are displayed at the top.
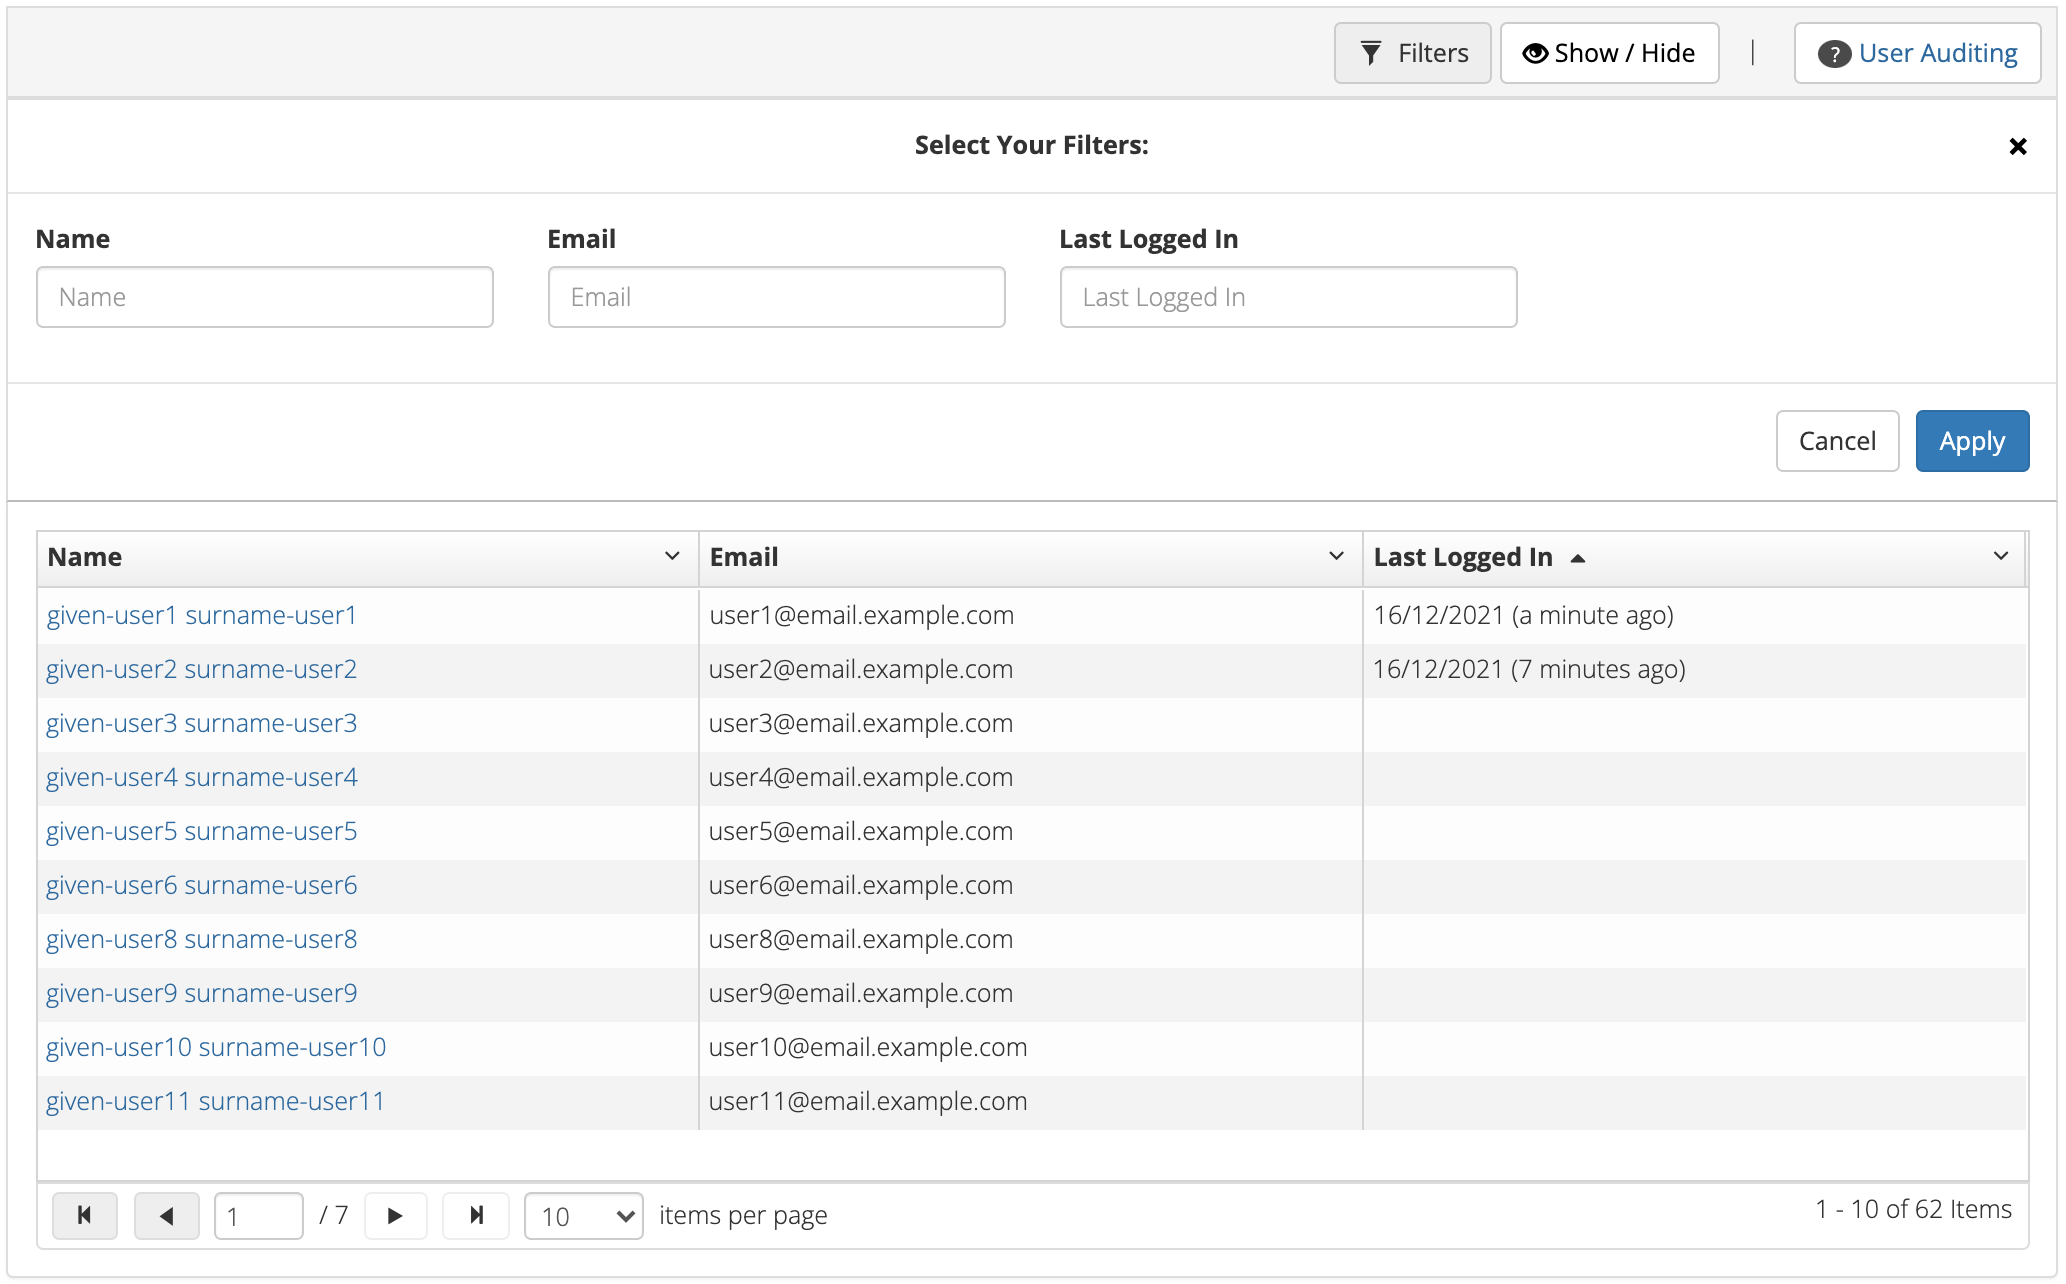
You can choose any of the filters to search for a user, depending on the user
information that is available.
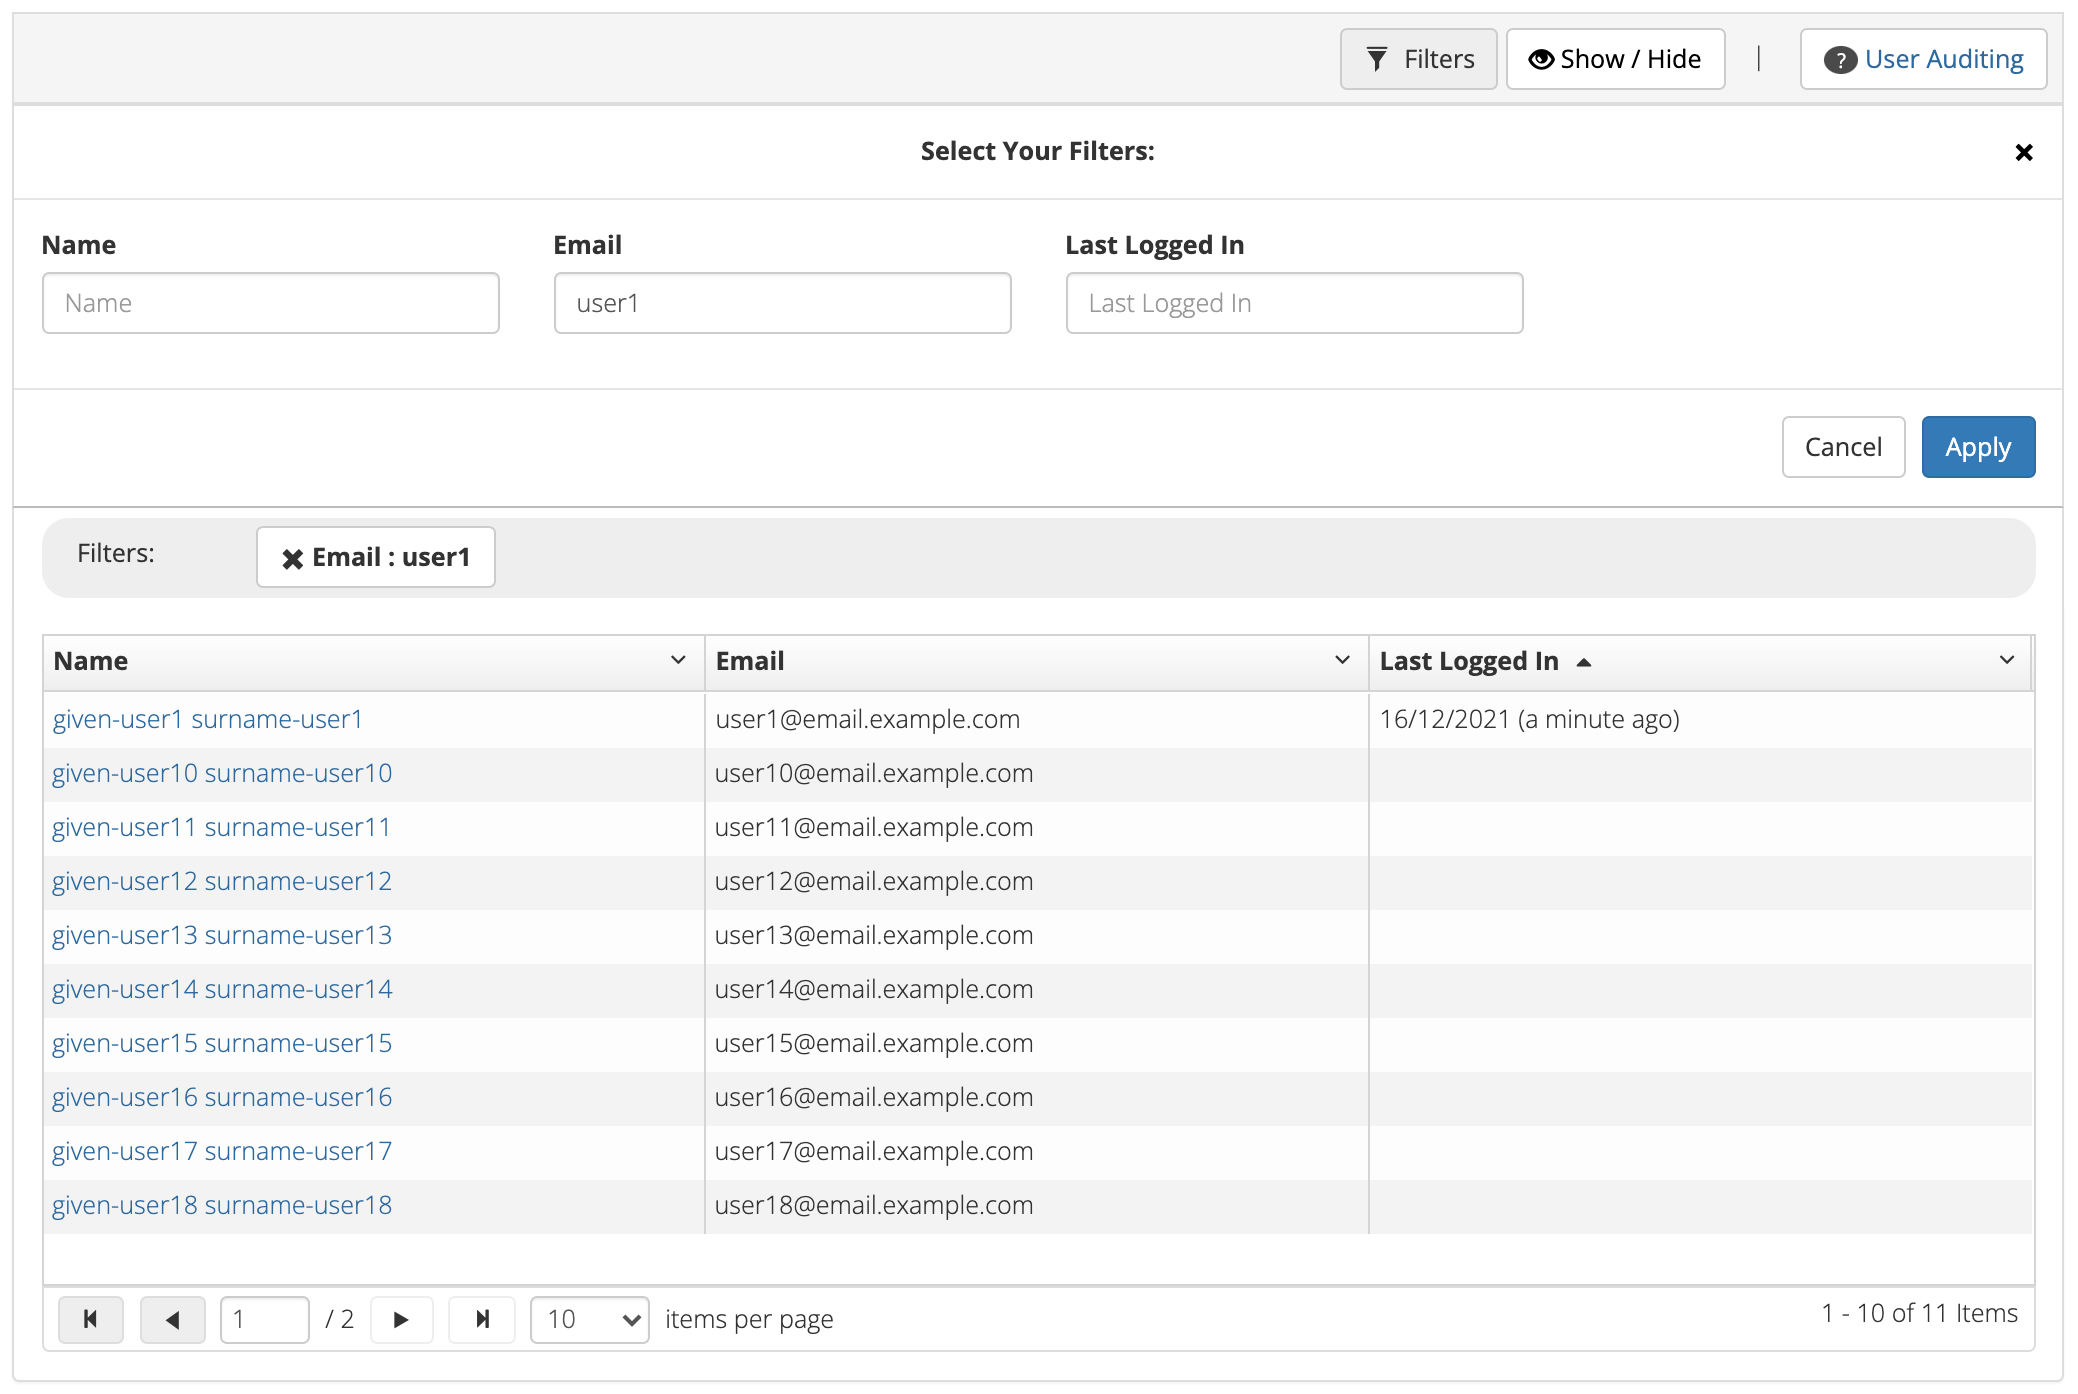
To filter the listed users:
Click the grey Filters button. This will open a field in which to enter
text
Type an appropriate filter into any of the fields
Click the blue Apply button
(or click the Cancel button if you decide not to filter the user data)
You can view the applied filters at the top of the filtered user data table.
To remove the filter, click the grey cross (X) listed before the filter name
or click the blue Clear all button.
You can sort the listed user search results by simply clicking the column header.
Alternately you can click the arrow beside a column header for more sort options,
as follows:
Clicking on the user’s name will take you to Editing a user’s roles. From there you
can edit there roles, or fully remove their access to the PMHC MDS.
Please note: use the ‘Actions’ feature when removing a user’s roles to remove that user from the User Auditing list.